DWUser.com
Empowering Web Creativity
Support Center - EasySiteMonitor
On-Demand Support Options
Resources to get started with and use the EasySiteMonitor program:
Quickstart Installation Instructions
When you download the EasySiteMonitor_buildVVV.zip file (where vvv is the build number) from your account, unzip the contents to an easy-to-find location. You will find the application installer inside this file. Installation is slightly different for Mac and Windows:
- Windows - To run the installer, double-click the EasySiteMonitor-Windows.exe application in the download package. Be patient; it may take a moment to launch. It will install any necessary prerequisites along with the actual application. Leave the default settings for any installation options unless you're an advanced user and you fully understand them.
- Mac - Double-click the EasySiteMonitor-Mac.dmg disk image file in the download package to open it. You will see one item inside: an installer labeled Install EasySiteMonitor. Double-click this file to run the installer. Be patient; it may take a moment to launch. It will install any necessary prerequisites along with the actual application. Leave the default settings for any installation options unless you're an advanced user and you fully understand them.
As soon as the installation completes, the application will automatically launch and be ready to use.
Quickstart Usage Instructions
On the first launch of the program, you will be prompted to enable automatic launching of the program each time you log in to your computer:

It is recommended that you enable this setting, lest you accidentally forget to open the program.
You can now click the Add Check button in the top-right corner of the program to create your first check:
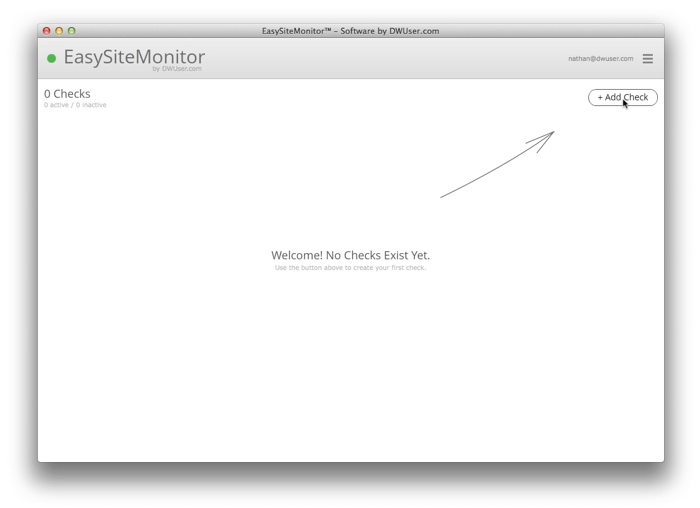
In the Add Check view, you'll see several options for the new check:
- The URL of the page to be monitored
- A nickname, which will be used in the program and in alerts to help identify the page more easily
- The frequency at which you would like the page to be checked (if you have many checks, you may want to reduce the frequency)
- Optionally, text that must appear in the page for it to be considered "up." If that text does not appear in the page when it is checked, you will be alerted that the site is down. This can be used, for example, to check if database output is as expected.
- The method to be used when checking the page content.
- The "Any change at all" option compares the raw source code of the page for any change at all. This is best for static sites that do not frequently change.
- The "Content length" option compares the length of the page's source code. Usually not recommended, since changes may have occured within the code yet the length remained the same.
- The "Change to elements in page" option is usually best for dynamic sites that have frequently-changing content. It analyzes the structure of the page, looking for changes to elements such as links, iframes, JavaScript code, etc, which can indicate undesired or illegitimate changes. Additional options for this setting are found via the "Show advanced settings" button.
- Whether sound alerts should be enabled for this check. If enabled, the program will play a subtle sound alert whenever a page-related event occurs.
- Finally, email and text message (SMS) alerts may also be configured. In the Create Alert dialog, you can select the alert type and the email or text message address of the recipient. You will need to use the "Add/Verify/Manage Contacts" link to add addresses you control:
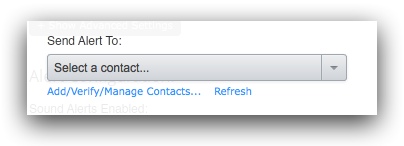
(After adding a contact, a verification email or text message will be sent; you must enter the code before alerts can be sent to that address.)
Once a check has been created, it will be listed in the main program window:
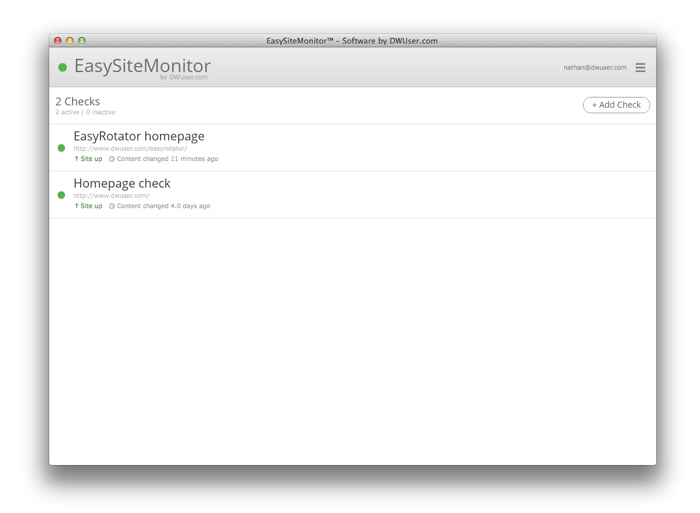
By hovering over a check in the list, you can access the edit and pause options:

Once a check has been added, three things are monitored:
- The page is checked reguarly to be sure it is up and accessible
- The content is analyzed for any changes
- The page URL is checked against Google's Safe Browsing malware and phishing databases for any record of a possible infection on the page. (To learn more about this data and what these advisories mean, reference this page. Please note that while this data is usually the most reliable on the Internet, there is always the slight potential for false positives or false negatives. However, because Google and multiple browsers use this same data to block sites, it is unquestionably one of the most important sources of data to consider.)
To view the latest detailed information about a check, simply click on its item in the main list; this will cause the program to transition to the check detail view:
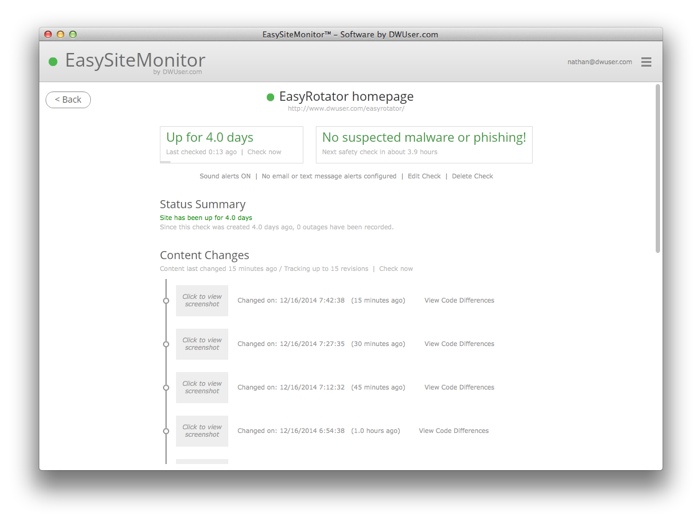
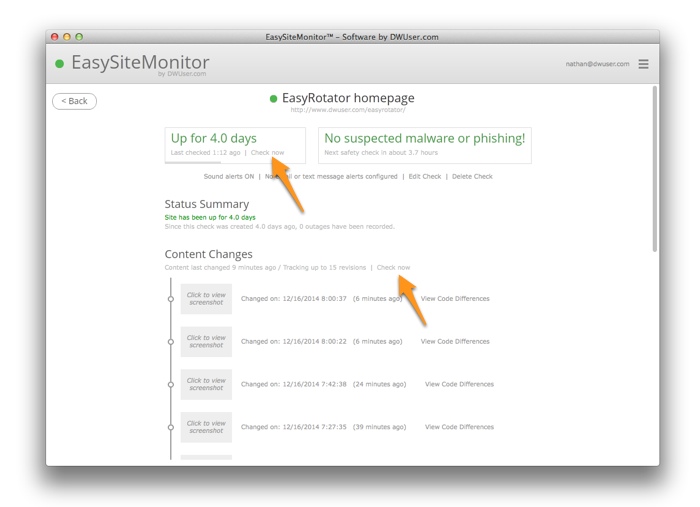
In this view, you will see a status update about uptime, the malware/phishing scanning status, and an overview of recent content changes. Settings can easily be accessed via the link bar just below the top row of boxes. Clicking on the thumbnails displays full-page screenshots of the pages as they appeared at the time each recorded change occurred:
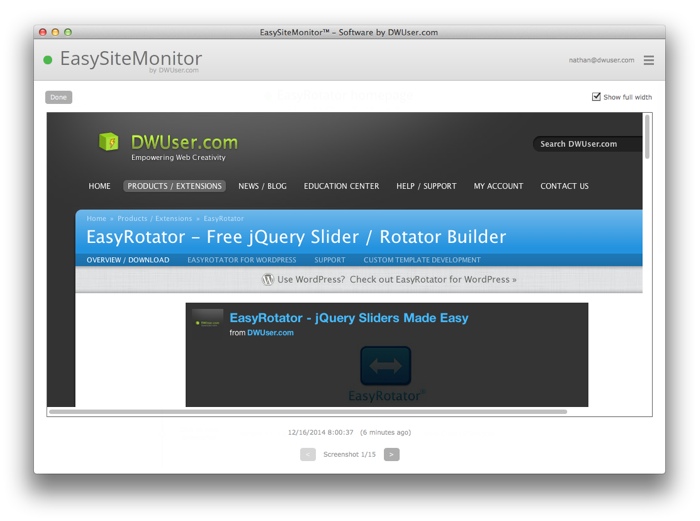
The arrows at the bottom can be used to navigate between each of the screenshots. The "Show full width" button in the top-right allows for toggling scaling.
The View Code Differences link allows for viewing the code differences between each revision:
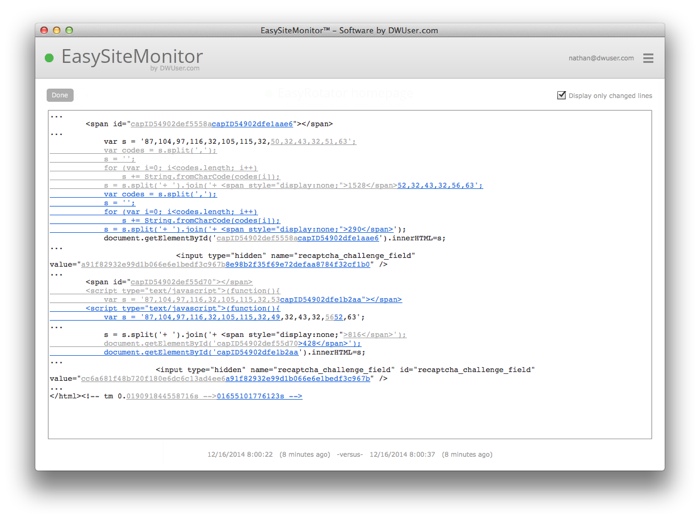
Note the option in the top-right to hide the identical lines, thus only showing the differences. This is enabled by default.
The "Check now" links can be used at any time if you want to manually check for status or content updates:
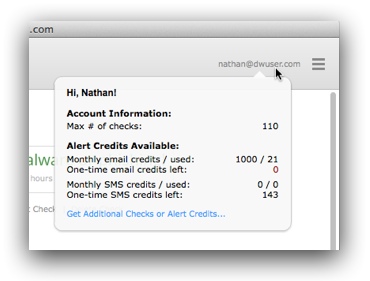
To view your alert credit usage, hover over your email address in the top-right corner of the program window:
The main program menu is accessible via the settings icon just to the right:
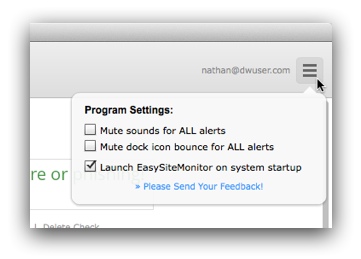
In that dialog, you can mute all of the alert sounds temporarily, mute dock/taskbar icon alerts, or toggle whether EasySiteMonitor should automatically open when you start your system.
If you have any questions about using the program or would like to share feedback, please get in touch using the options below.
Interactive Support Options
Can't find an answer in the on-demand options? Try interacting with other users on the forums or contacting support: