DWUser.com
Empowering Web Creativity
Support Center - EasyBigBackground
On-Demand Support Options
Resources to get started and use the Dreamweaver / Standalone version:
FAQs / Common issues:
Quickstart Installation Instructions
When you download the EasyBigBackground_buildVVV.zip file (where vvv is the build number) from your account, unzip the contents to an easy-to-find location. The first step is to install the wizard program. This step is slightly different for Mac and Windows:
- Windows - To run the installer, double-click the EasyBigBackground-windows.exe application in the download package. Be patient; it may take a moment to launch. It will install any necessary prerequisites along with the wizard program. Leave the default settings for any installation options unless you're an advanced user and you fully understand them.
- Mac - Double-click the EasyBigBackground-Mac.dmg disk image file in the download package to open it. You will see one item inside: an installer labeled Install EasyBigBackground. Double-click this file to run the installer. Be patient; it may take a moment to launch. It will install any necessary prerequisites along with the wizard program. Leave the default settings for any installation options unless you're an advanced user and you fully understand them.
The next step is optional. If you have Dreamweaver, you can use the included Dreamweaver extension for easier access to EasyBigBackground for creating and managing backgrounds. To install the extension, first launch the Extension Manager by selecting Help > Manage Extensions in Dreamweaver. (If you have an older version of Dreamweaver that doesn't have this option, launch the Macromedia Extension Manager directly from your Applications/Programs menu. Then, in the Extension Manager, select your version of Dreamweaver from the Products menu.) Click the Install button, browse to the EasyBigBackground_DW_ext.mxp file from the download package, then click OK and allow the installation to complete. Restart Dreamweaver, and the extension will be ready to use.
Quickstart Usage Instructions
The preparation for creating a background differs slightly, depending on whether you're using the Dreamweaver Extension or not:
- Preparation for Dreamweaver Extension - You must have an existing HTML page that will hold the new background. (You can create a new page if needed.) Additionally, you must have already created a Dreamweaver Site Definition and saved your page within the site's root folder. (The site's root folder is the folder that holds the homepage.) Finally, you must have placed all of the image files you plan to use in the background within the site's root folder.
- Preparation for Standalone version - You must have an existing HTML page that will hold the new background. (You can create a new page if needed.) Additionally, you must have a single folder that holds all of the files for your site, including the HTML page and the image files you'll use in the background. This folder is referred to as the Site Root Folder; it is the folder that holds your homepage. If you're not sure what this folder should be, just assume that it's the folder holding the HTML page; in this case, place all of your image files in this folder as well, e.g. within a background_images/ sub-folder for organization.
There are two ways to access the EasyBigBackground wizard to create a background, depending on whether you're using the Dreamweaver Extension or not:
- Accessing the Dreamweaver Extension - Place the cursor at any location near the bottom of your page. Select Insert > DWUser > EasyBigBackground to launch the wizard. The Dreamweaver communication dialog will appear momentarily:
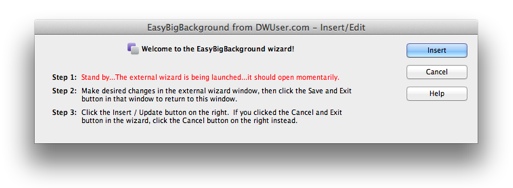
The EasyBigBackground wizard will automatically be launched and appear after a moment. - Accessing the Standalone version - You will launch the EasyBigBackground program directly from your Programs or Applications menu. When you first launch, you'll have to specify the HTML page and site root folder that you're working with. You'll use the values you determined when preparing to insert, as discussed above.
You'll now be in the EasyBigBackground wizard, with the main wizard view visible:
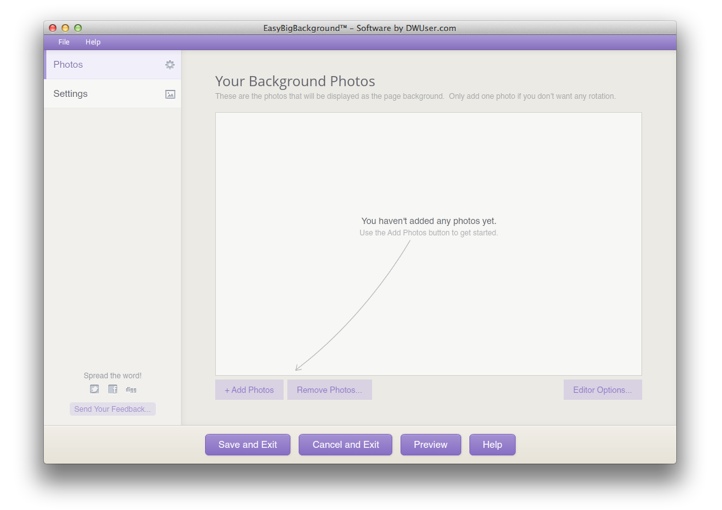
Here's an overview of the interface:
- On the left side are the main navigation buttons. The buttons provide access to the two main sections of the wizard - the Photos section and the Settings section.
- Along the bottom are the main program buttons:
- Save and Exit - This is the button you'll use to exit once you're done creating or editing a background and ready to exit the wizard.
- Cancel and Exit - If you change your mind about creating or editing a background, you can cancel and none of your changes will be preserved.
- Preview - As you're making changes and creating or editing a background, this button allows you to preview your work with a single click.
- Launch Help - Provides a shortcut to this help page.
- The Feedback button on the bottom left allows you to instantly send feedback about EasyBigBackground from within the program.
The Photos Section is where you'll specify the photos to display in the background:
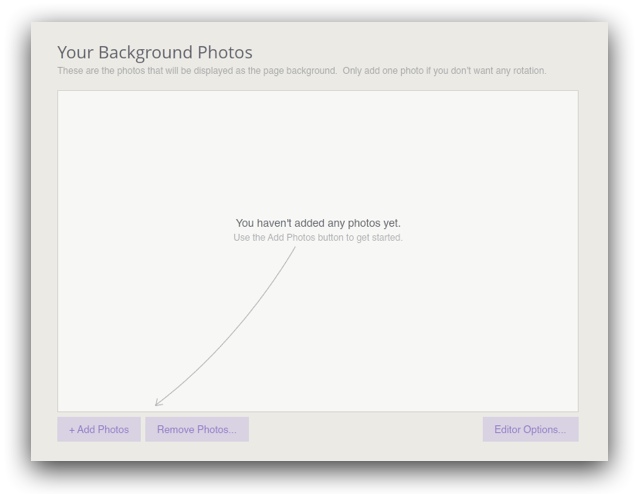
To add one or more photos to the background, click the Add Photos button at the bottom left. You'll be given the option to select one or more photos in a file browse dialog. As mentioned before, these files should already have been placed within your site's root folder.
Note for EasyRotator users: Note that you will select the photo file(s) directly in the browse dialog. This is in contrast to EasyRotator, where you select the photo folder.
If you add just one photo, that photo will be the only one in the background. If you wish several photos to rotate in the background, select multiple photo files. (Rotation options will be covered in a moment.)
For best quality, these photos should have a large resolution. They should usually be at least 1200×800 pixels. Smaller photos can be used, but the photo quality will be degraded when they are scaled up on large monitors.
Once you've selected the photos, a preview of each will appear in the editor:
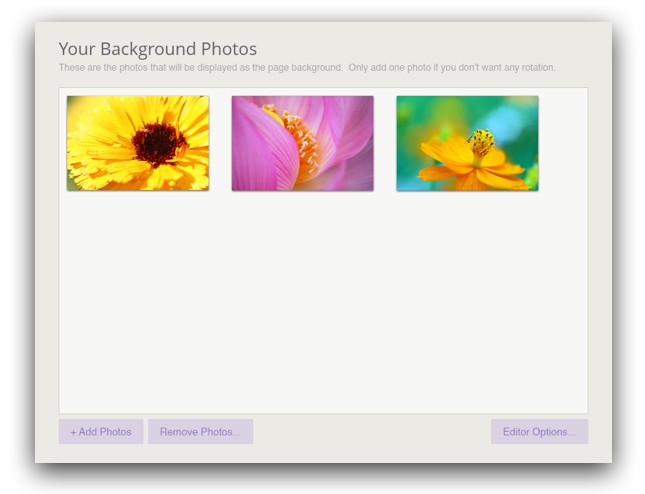
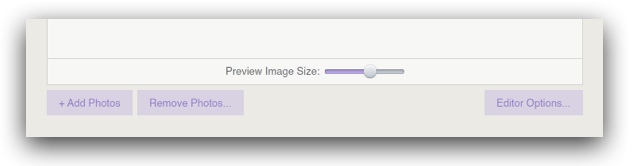
You can hover over a photo to view file name and dimensions information; double-click to modify its source. The Editor Options button at the bottom right allows you to access options such as the preview image size:
To re-order the photos, simply drag them within the main preview grid.
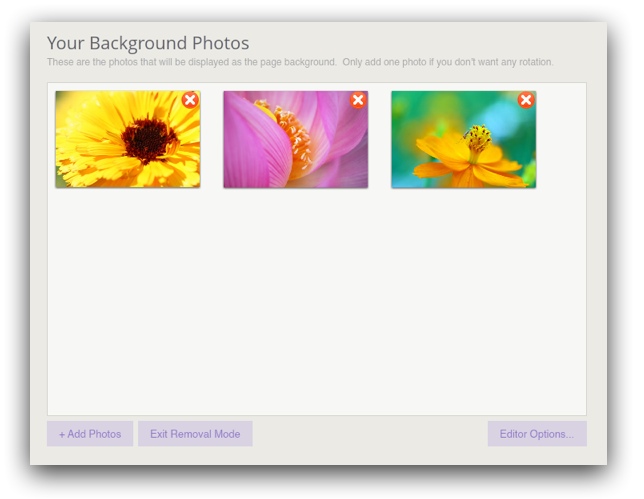
The Remove Photos button at the bottom allows you to toggle in and out of delete mode. When in delete mode, a red 'X' will appear on each photo. You can remove an individual photo by clicking the 'X' on it, or select multiple photos and then click one of the 'X's to remove several at once:
Once you've added all of your photos and ordered them as desired, you can use the Preview button at the bottom of the editor to see how the background will currently appear.
To configure the appearance options for the background, use the main navigation menu on the left to change to the Settings section:
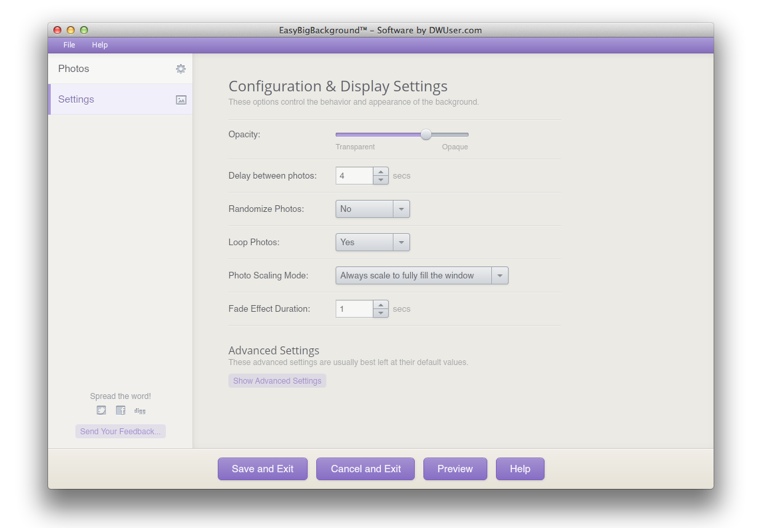
Most of the options here are self-explanatory:
- The Opacity option controls the transparency level of the background, whether it should be faded-out or fully opaque
- The Delay Between Photos option applies when you have added more than one photo to the background. In these cases, the option controls how long each photo should be visible.
- The Randomize Photos option causes the photos' order to be shuffled before any rotation starts.
- The Loop Photos option allows you to specify if the photos should be rotated through indefinitely or just once.
- The Photo Scaling Mode option specifies how the photos should be scaled. By default, they will be scaled to fully fill the browser window; you can also make them be only scaled down or not scaled at all.
- The Fade Effect Duration option specifies the speed of the transition between the photos.
The Show Advanced Settings button may be used to access additional advanced options. These settings are generally best left at their default values.
- The Fade-in Threshold setting specifies the minimum loading time that must pass before the initial photo will be faded in. If the first photo loads sooner, it will appear instantly, with no transition. This setting ensures that the first background photo gently fades in if a few seconds are required for it to load.
- Minimum Screen Size. On small mobile devices (such as smartphones), the use of large background photos may cause the page to bog down. This option allows you to hide the background for devices whose screen dimensions are smaller than the specified value.
Once you're done adjusting settings and are satisfied with the results in the Preview window, you're ready to click Save and Exit. The results, as well as the steps for editing, depend on whether you're using the Dreamweaver Extension or Standalone version:
- Dreamweaver Extension - The wizard will close and you'll be returned to the Dreamweaver extension's intermediary dialog:
Click the Insert button to actually add the background to your page. (If you change your mind and don't wish to add the background to your page, click Cancel instead.) The background will be inserted at the bottom of your page:
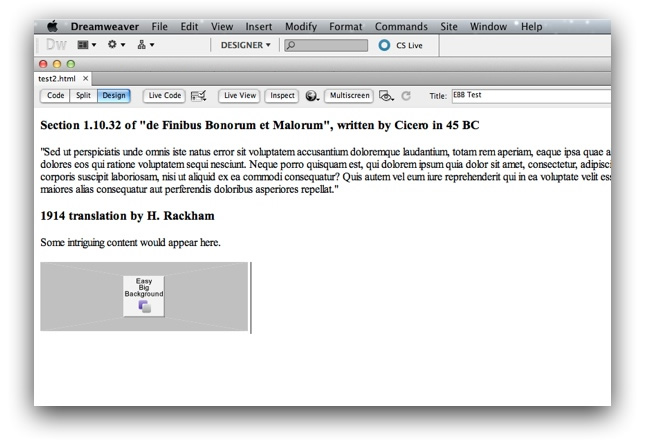
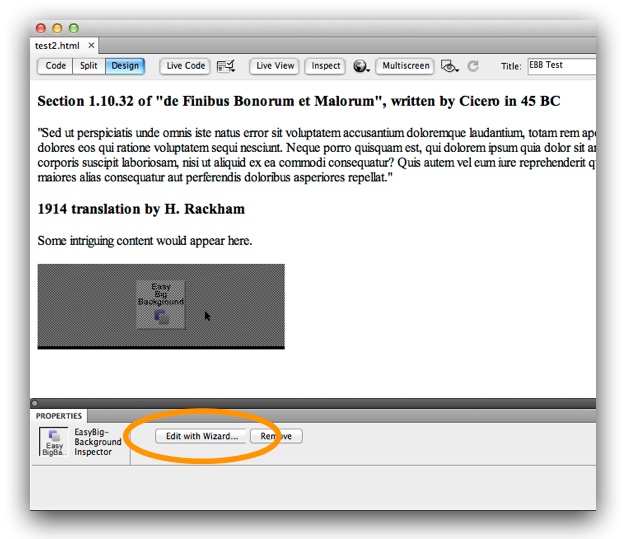
Within Dreamweaver, you will see the gray EasyBigBackground placeholder at the bottom of your page. If you want to view the working background, preview the page in a browser. To make edits, select the placeholder and use the Edit button in the Properties panel (Window > Properties):
You can also use the inspector panel to quickly remove the background. To add the same background to another page, you can copy and paste the element from one page to another; alternatively, you can add the background directly to a Dreamweaver template file. - Standalone version - The wizard will close and you'll receive a confirmation that the background code has been added to your page. The code will be added at the end your page, just before the closing </body> tag. The code should be left at the bottom of the page. The code starts with <!-- Begin DWUser_EasyBigBackground --> and ends with <!-- End DWUser_EasyBigBackground -->.
To make edits or add a background to another page, re-open the EasyBigBackground program as before. When you're prompted to specify the HTML page and Site Root Folder you're working with, the fields will be auto-filled with the last-used values. Proceed with those same values to edit the existing background.
If you have any questions about using EasyBigBackground, please let us know by opening a support ticket below.
FAQs
A: By default, the background is hidden on devices with small screens. You can adjust this in the Settings section of the editor; expand the Advanced Settings section and change the Minimum Screen Size setting to be e.g. 1 instead of 481 (the default).
Interactive Support Options
Can't find an answer in the on-demand options? Try interacting with other users on the forums or contacting support: