DWUser.com
Empowering Web Creativity
Support Center - Flash Audio Kit for Dreamweaver
On-Demand Support Options
Resources to get started and use the extension:
Quickstart Installation and Usage Instructions
When you download the FlashAudioKit_vvv.mxp file (where vvv is the version number), save the file to an easy-to-find location. Next, launch Dreamweaver and select Help > Manage Extensions to launch the Extension Manager. (If you don't see this option, you can also launch the Extension Manager directly from your Applications/Programs menu.) Click the Install button, browse to the MXP file you downloaded and saved, then click OK and allow the installation to complete. Restart Dreamweaver, and the extension will be ready to use.
Before inserting Flash Audio on a page, you must have defined a Dreamweaver site. If you're not familiar with Dreamweaver sites, view this helpful introduction video.
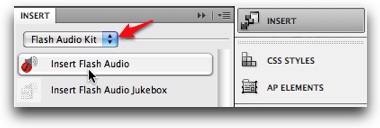
The extension is accessed via the Flash Audio Kit section of the Insert Panel (Window > Insert). Click the Insert Flash Audio button to launch the extension dialog. Shown here are both newer (CS4+) and older versions of Dreamweaver:

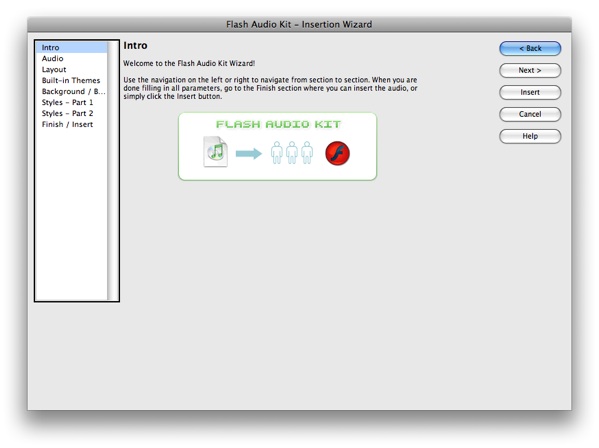
Use the list on the left of the dialog to navigate from section to section. The Help button on the right will launch included help files.
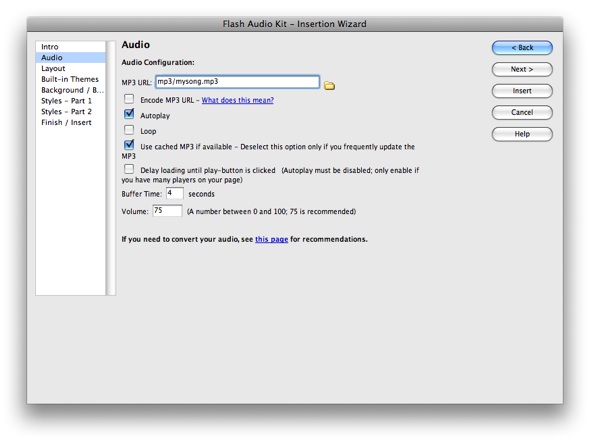
The first main section, Audio, is where you specify the audio file and various audio options. The audio must be in MP3 format; if you need to convert your audio, see the converter recommendations below.
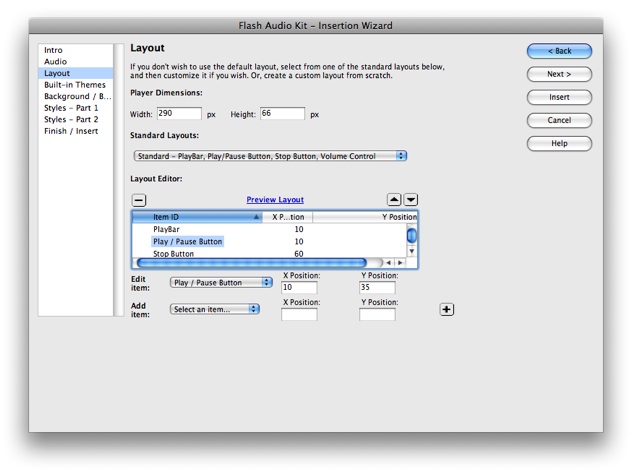
The Layout section is where you can choose a pre-built layout, make adjustments, or build one from the available elements:
The Built-In Themes section allows you to choose a pre-built color scheme. The remaining sections allow for additional customization of styles, including the background and border. Once you're finished making adjustments, click Insert to insert the Flash Audio player. The inserted player will appear in your page:
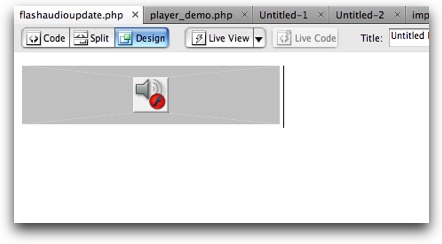
By clicking on the audio to select it, you can access two additional options:
In the Properties Panel (Window > Properties), the Edit button can be used to launch the edit wizard and make changes. The edit window is identical to the Insert window.
In the Insert Panel (Window > Insert), the Insert Jukebox option can be selected to add a Jukebox controller to the selected audio:
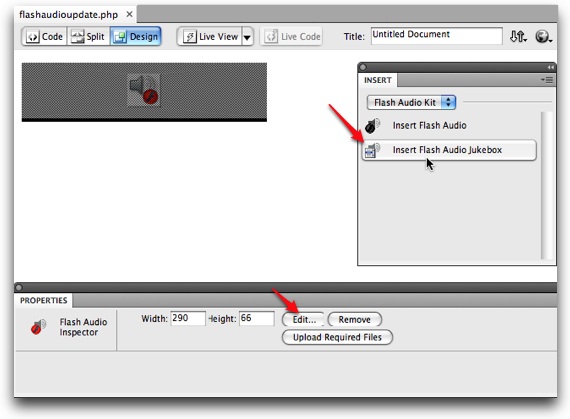
Important: Please note that a Flash Audio player must be selected to insert a Jukebox controller, since each Jukebox controller is associated with a Flash Player player. Until a Flash Audio player is selected, the Insert Jukebox button will be disabled.
If you wish to add a Jukebox controller to the Flash Audio player, click the Insert Jukebox button to launch the Jukebox extension dialog. This wizard is navigated in the same manner as the player wizard, with a list on the left. The most important section again is the Audio section, where all of the MP3 files for the controller are specified:
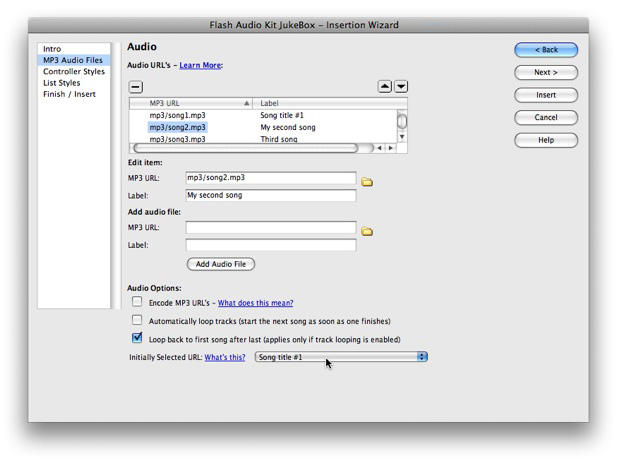
For each track, enter the URL and the label in the Add Audio File section then click Add Audio File. The selected item can be edited using the Edit Item section. The Automatically Loop Tracks option can be enabled if you want the tracks to automatically progress from one to the next. In the Initially Selected URL field, select the track that corresponds to the file you specified for the Flash Audio player.
In the other sections, additional options are available to customize the appearance of the controller. When you are finished, click the Insert button to add the controller to your page:
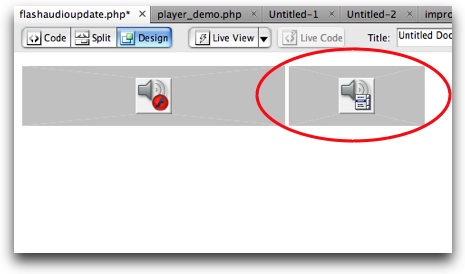
As with the Flash Audio player, you can select the Jukebox and click the Edit button in the Properties Panel (Window > Properties) to make changes to the controller.
Audio Converter Recommendations; Avoiding "Chipmunks" Audio
If you need to convert your audio into MP3 format or re-encode it, we recommend the excellent freeware program called Switch (by NCH Software). The free version allows for conversion from many major audio formats into MP3 format, as well as offering quality and encoding options. Switch works on both Mac and Windows machines.
Important - Avoiding "Chipmunks" Audio:
When encoding (or re-encoding) MP3 files to use with the slideshow, there are two settings which will come up: the sample rate and the bitrate. The Flash Player has inherent limitations which must be followed to ensure that the audio plays correctly. The most common issue is with the sample rate. The preferred sample rate is 44100 Hz, but 96000, 22050 and 11025 Hz are all supported. Failing to use a supported sample rate will result in the audio playing back at a distorted speed, often described as "chipmunks."
You can use any bitrate for the MP3 as long as it is constant; variable bitrates are not supported. A lower bitrate corresponds to smaller file size and faster download times, but reduces quality. A higher bitrate produces higher quality, but takes longer to load. The best bitrate depends on your situation and the type of audio you're using.
Video Usage Tutorials
Two video usage tutorials are available. The first covers the process of inserting a Flash Audio player. The second shows how to add a Jukebox Controller to that Flash Audio player.
FAQs
Q: My audio plays, but sounds like "chipmunks."
A: This is caused by using an unsupported sample rate when encoding your MP3. For more information, see the the conversion notes above.
Q: When I preview the Flash audio, the player doesn't show up, or is just a gray rectangle.
A: If you're previewing locally, make sure the following setting is disabled: Edit > Preferences... (Dreamweaver > Preferences... on Mac) > Preview in Browser > Preview Using Temporary File. If you're previewing on your uploaded site, make sure that all files in the (Site root)/flashaudiokit/ supporting files folder have been uploaded.
Q: When I preview the Flash Audio, the player shows up, but it is unresponsive and doesn't play the audio.
A: Most likely, you haven't uploaded your audio file(s). Make sure that all audio files have been uploaded and try again.
Interactive Support Options
Can't find an answer in the on-demand options? Try interacting with other users on the forums or contacting support: