DWUser.com
Empowering Web Creativity
Support Center - EasyRotator for WordPress
EasyRotator KnowledgeBase – Controlling WordPress Widget Positioning
When you're working with EasyRotator for WordPress and add rotator widgets to your theme, the default alignment and positioning may not result in the display you want. In this article, we cover how to make common positioning modifications to rotator widgets.
- General: Locating the ID of a rotator widget - Read this first, as it applies to all of the later sections
- Centering the rotator within the widget area
- Moving the rotator widget to the left
Locating the ID of a Rotator Widget
To modify the positioning of a rotator widget, we have to add CSS to the site's stylesheet. To determine the CSS that's needed for these changes, we need to identify the ID of the div that holds the rotator widget. To do this, you need to have installed and launched Google Chrome.
Open your site in Google Chrome and select the Wrench icon on the right end of the address box. From this menu, select Tools > Developer Tools. You'll see something like this:
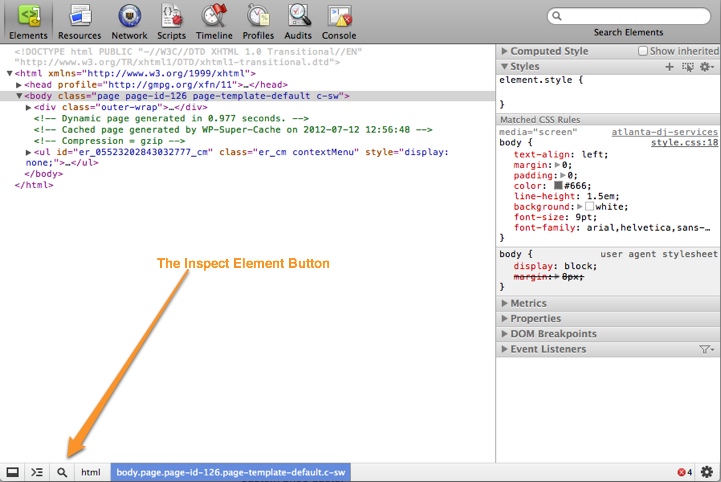
If you've never seen this screen before, don't be overwhelmed! It's not as complex as it looks at first. Resize and position the developer tools window so that you can see both the rotator and the developer panel at the same time.
In the bottom left, you'll see an icon that looks like a magnifying glass. This is the Inspect Element button. Click this button so that it is highlighted in blue. Then, click on your rotator widget in the main browser window. Here's how things should look just before you click on the rotator widget:
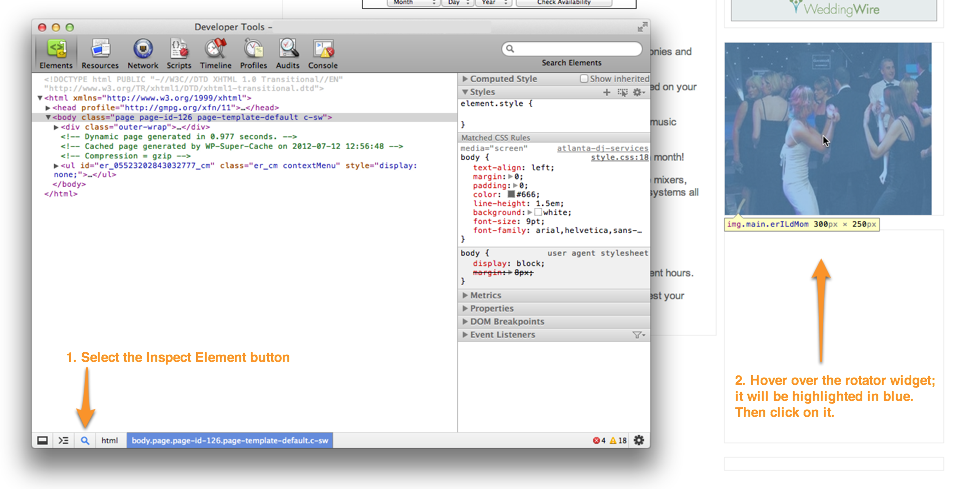
Notice how the rotator is highlighted in blue - that's what we want. Once you see the highlight, click on the rotator. This will cause the view in the developer panel to expand, with the just-selected element highlighted in a dark blue:
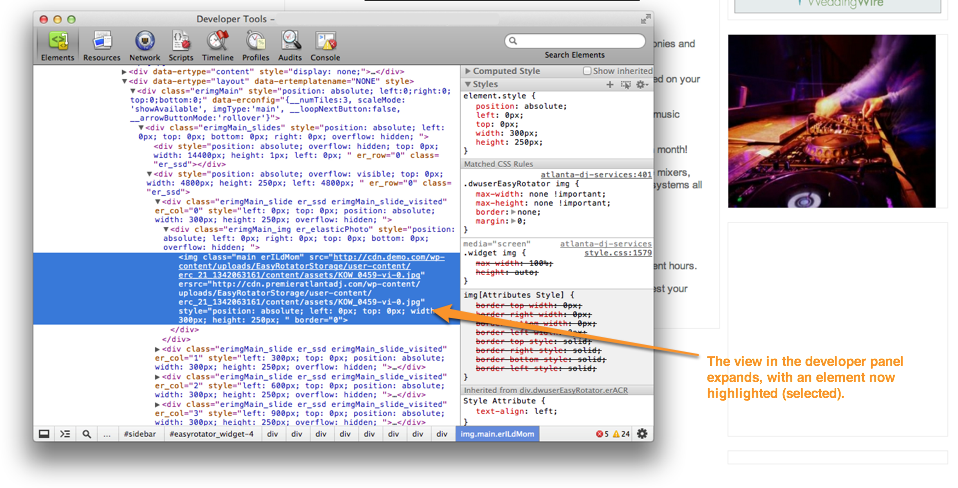
If you hover over the selected element in the developer panel, you should again see the highlight on top of the rotator widget on the right.
Now, scroll upward a little way in the developer panel until you see <!-- Begin DWUser_EasyRotator --> in green:
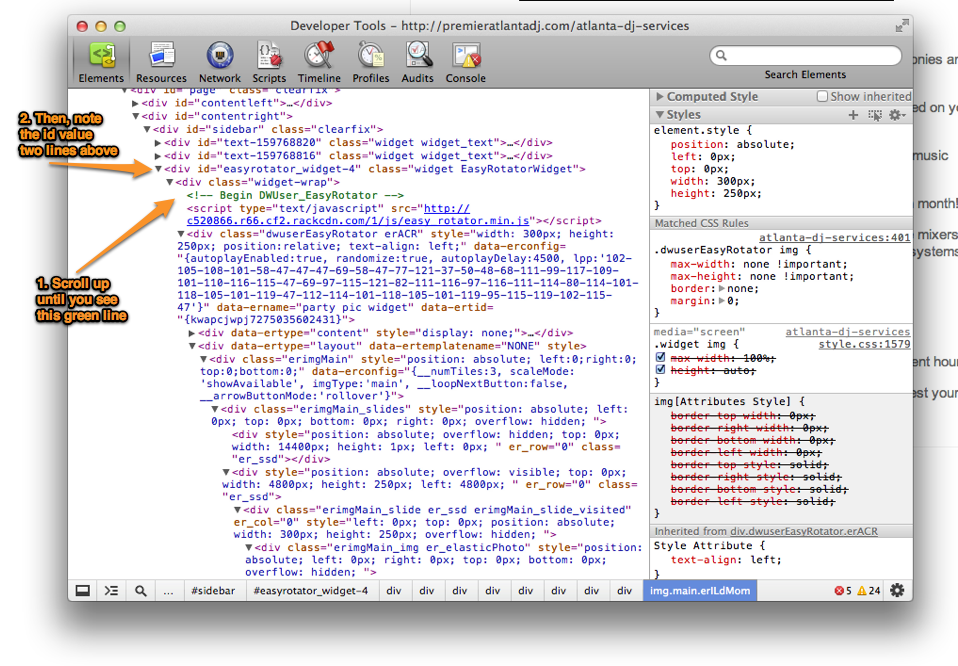
Note the line that is two lines above, with a class of EasyRotatorWidget:
<div id="easyrotator_widget-4" class="widget EasyRotatorWidget">
Depending on your theme, this may also be an <aside> element (instead of a <div>), but it will always have a class of EasyRotatorWidget. Regardless, this is the important line that contains the ID for our rotator widget. As highlighted above, the ID value for our example widget is: easyrotator_widget-4
We will use this ID value to target our CSS in the upcoming sections.
Centering the Rotator Within the Widget Area
Suppose the widget is currently left-aligned and we want to center it horizontally within the widget area:
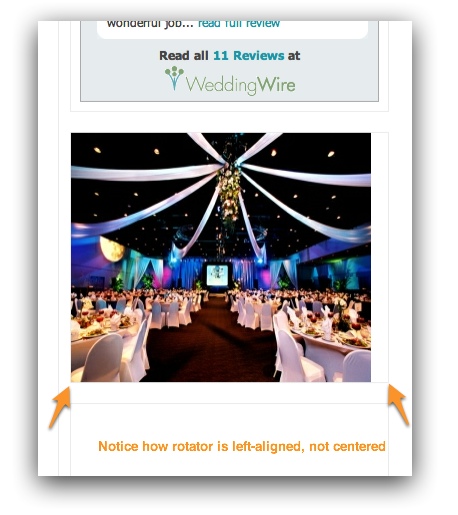
To center the widget, add the following CSS to your theme's stylesheet:
#easyrotator_widget-4 div.dwuserEasyRotator {
   margin: 0 auto;
}
Replace the highlighted value with the ID value we determined in the first section above. Note that the value is prepended with a hash (#) to indicate that we are targeting an element by its id value.
Moving the Rotator Widget to the Left
Suppose the rotator's width is causing it to appear too far to the right, out of alignment:
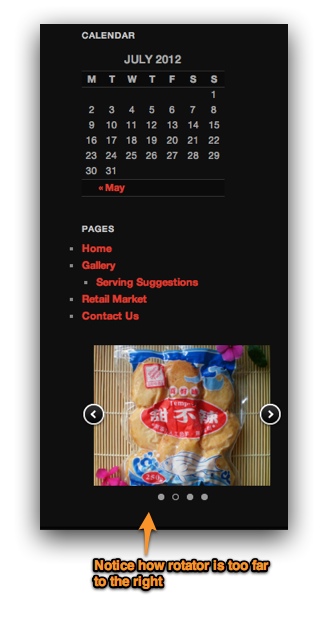
To move it to the left into alignment with the other widgets, add the following CSS to your theme's stylesheet:
#easyrotator_widget-4 {
   margin-left: -40px;
}
Replace the yellow-highlighted value with the ID value we determined in the first section above. Note that the value is prepended with a hash (#) to indicate that we are targeting an element by its id value. Update the blue margin-left value as needed until you achieve the desired alignment. You may need to experiment with a few values to determine the perfect value for your needs.
Note that this method can be used to move a rotator widget to the right as well, either by using a postive margin-left value (e.g. margin-left: 40px;) or using margin-right instead. As with all theme modifications, the specific code needed depends on the theme you're using.
We're Here to Help!
If you have any questions about this article or about using EasyRotator for WordPress, please let us know by opening a support ticket below.