Download Help PDF (29MB) | Search:
This topic demonstrates integrating a PayPal purchase button with a slideshow, allowing for the sale of prints, products, etc. The example uses a PayPal purchase button, but the techniques are applicable to any type of e-commerce system.
The basic principles are as follows:
First, open the XML configuration file for editing. This can be done by selecting the slideshow in Design View and clicking the 'Edit Manually...' button in the Properties panel. Near the bottom of the file, locate the <galleries> section and find the <img ... /> lines in this section. On each of these nodes, add a new itemName, itemNumber and itemPrice field. For example, the bolded code might be added:
...
<img src="toycar_red.jpg" title="A title for this slide... tell about the car" itemName="Red Toy Car" itemNumber="TOYCAR1" itemPrice="15.00" />
<img src="toycar_blue.jpg" title="A title for this slide... tell about the car" itemName="Blue Toy Car" itemNumber="TOYCAR2" itemPrice="22.50" />
...
Save and close the XML configuration file.
Next, you'll need to add the standard PayPal purchase button code to your page (within the <body> tag). Some modifications have been made, allowing for an item number to be passed and making the form invisible. The bolded email address must be replaced with your PayPal email address. Additionally, the default submit button has been removed:
<div style="display: none;">
<form name="_xclick" action="https://www.paypal.com/cgi-bin/webscr" method="post">
<input type="hidden" name="cmd" value="_xclick">
<input type="hidden" name="business" value="[email protected]">
<input type="hidden" name="currency_code" value="USD">
<input type="hidden" name="item_name" value="FillerName">
<input type="hidden" name="item_number" value="FillerNumber">
<input type="hidden" name="amount" value="12.99">
</form>
</div>
The next step is to create the javascript function. In the <head> of your document, add the following code. JQuery is being used to simplify the code.
<script language="javascript" type="text/javascript" src="http://ajax.googleapis.com/ajax/libs/jquery/1.3.2/jquery.min.js"></script>
<script language="javascript" type="text/javascript">
function doPurchase(itemNumber, itemName, itemPrice)
{
// Update the form with the new information
$('input[name="item_number"]').val(itemNumber);
$('input[name="item_name"]').val(itemName);
$('input[name="amount"]').val(itemPrice);
// Submit the form, redirecting the user to PayPal to complete the purchase
$('form[name="_xclick"]').submit();
// Return false so that the caller doesn't try to do any redirect
return false;
}
</script>
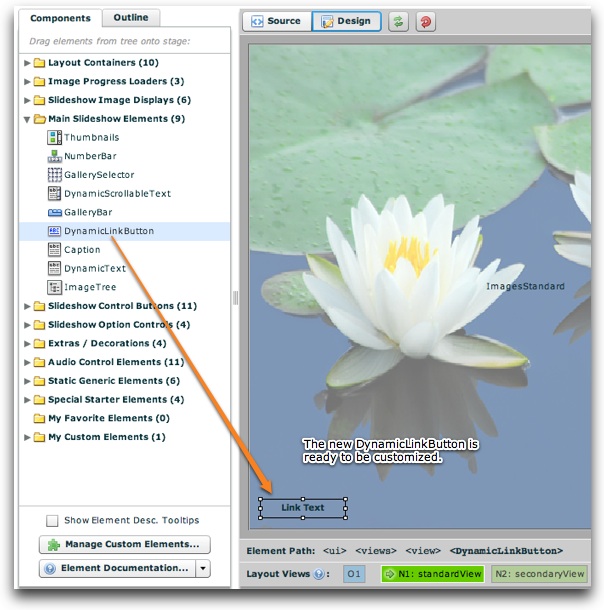
Now, open the wizard and switch to the Layout / Presentation section. Select the layout view where you want to add the purchase button; this will usually be the same view as that which displays the images. Drag a new DynamicLinkButton element onto the stage from the Main Slideshow Elements section of the Components Panel:
Next, the button's width is increased so there's more space for the label. Then, the Label Text and Link URL properties are set in the Properties Panel:
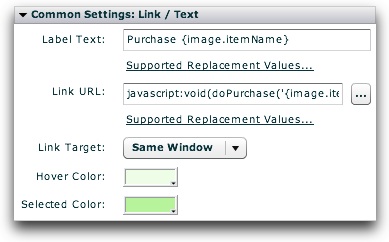
The Label Text is set to be Purchase {image.itemName} . By using the replacement value, this will make the button display for example 'Purchase Red Toy Car'. The Link URL is set to:
javascript:void(doPurchase('{image.itemNumber}', '{image.itemName}', '{image.itemPrice}'));
This calls the javascript function earlier defined in the page. Again, the replacement values are used to pass the special item information attributes to the purchase function. Note that quotes are still used around each value; failure to do so will result in errors.
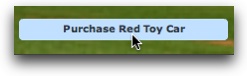
When previewed in a browser, the purchase button appears like this:
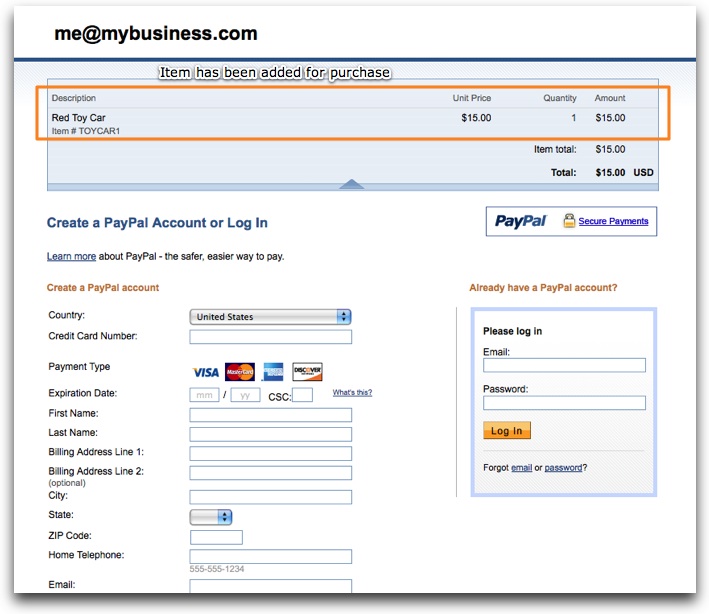
When clicked, you will be taken to PayPal where the purchase can be completed. All of the item's information has automatically been specified: