 Download Help PDF (29MB) | Search:
When you are developing a slideshow, you'll likely want to preview your work as you make changes. There are two methods to accomplish this -- you can preview directly in the wizard using the Preview feature, or preview the file on your local machine in a browser.
One of the most important improvements in version 4 is the introduction of a new built-in Preview feature. This allows you as the designer and/or developer to preview your slideshow instantaneously as you make changes in the external insert/edit wizard without uploading any files or exiting the wizard. This improvement offers immense time savings.
Tip: See Previewing Touchscreen Content In the Wizard below for more information about the new touch-mode preview available in Build 214+.
To preview a slideshow, you'll click the Preview... button at the bottom of the wizard:

This will launch the preview dialog, which is a separate application window; because it is a separate window, you can switch back to the main wizard and make more changes, then flip back without re-launching the preview. When you're ready to preview any new changes, click the Preview button again. This will re-launch the preview window.
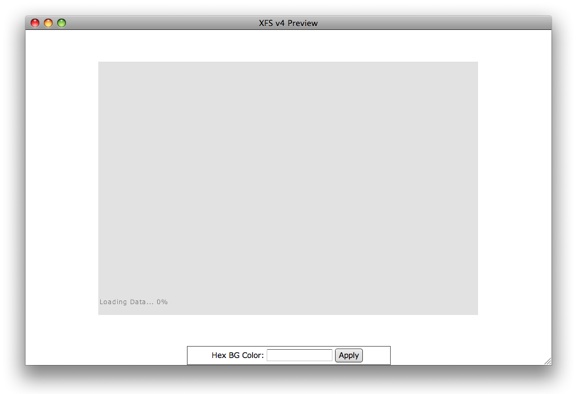
The first time you launch the preview window, you will receive a message confirming that you want to commit your changes:
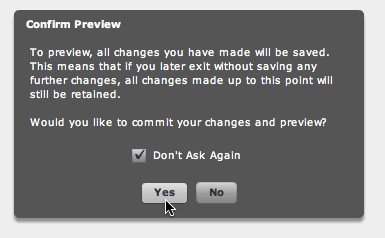
This is because the changed data must be written to the XML configuration file in order to generate the preview. Thus, any changes which you have made which affect the external XML file will be applied. Therefore, cancelling out of the wizard after commiting data for a preview will still result in the changes being maintained. If you are making changes which you may want to later undo, you can always save the slideshow's settings as a template (see the Using Templates section of the manual). Then, if something goes wrong, you can revert back to the working version. If everything goes smoothly, you can remove the unneeded template. If you leave the 'Don't Ask Again' checkbox selected, you won't receive the message again when you click the Preview button for the duration of your wizard session.
To change the background color of the preview window, enter a CSS color name or hex color window in the Background Color box at the bottom of the preview window and click Apply:

Keep in mind that this setting doesn't affect the slideshow or your HTML page in any way; it just allows you to customize the appearance of the preview window.
This new feature, part of the Touchscreen Content update, is available in Builds 214+.
In Builds 214+, an arrow appears on the right edge of the Preview button; selecting that arrow opens the following menu:

Selecting the Touch-mode Preview... option lets you view a rough preview of what users will see when viewing the alternate touchscreen-optimized content specified in the main Touchscreen Content section of the wizard. Important: To view the touch-mode preview, you must be running version 2.5 or higher of the Adobe AIR Runtime. You can update to the latest version at http://get.adobe.com/air/ . Selecting the touch-mode preview option will launch the preview window:
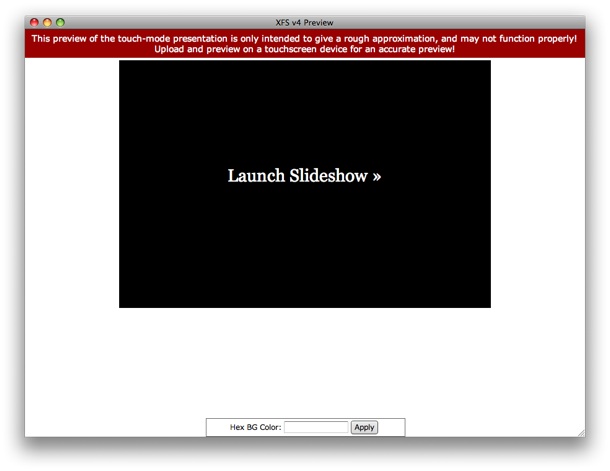
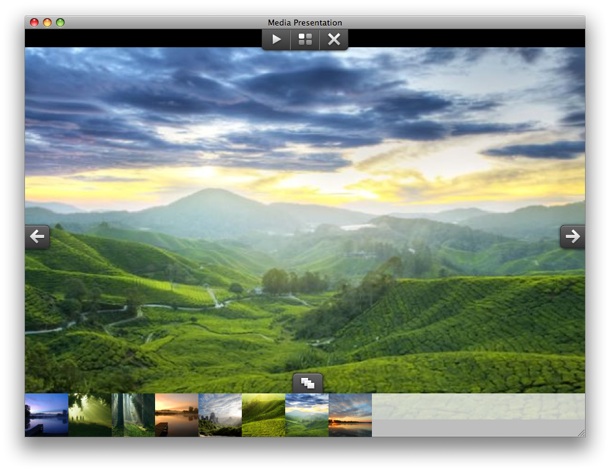
These example screenshots show a slideshow with Fullscreen Touch-mode enabled.
Please Note! As the warning emblazoned across the top of the window advises, the touch-mode preview is only intended to give a rough approximation and may not function entirely properly, especially related to mouse-based input. For a completely accurate preview of the touch-mode content, save and exit, deploy the content to a server and load the HTML page holding the slideshow in the browser on a touchscreen device.
When you preview a slideshow a slideshow locally for the first time, you may receive two error messages, like this:
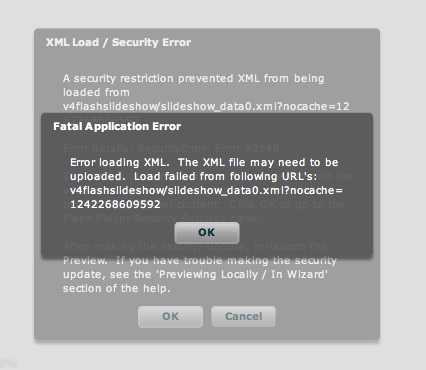
The first message says that the XML file failed to load. The second explains this error, stating that it is due to a Flash Player security restriction:
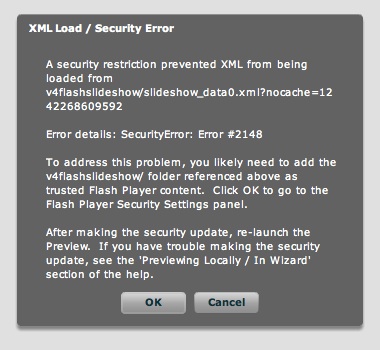
The problem is that when previewing locally (such as in the wizard, or in a browser from a file:/// based URL), the Flash Player by default won't let any SWF files load external data. This prevents the slideshow from being able to load the XML configuration file or any image files. Keep in mind that this does not affect any slideshows once they are viewed on a server, using an http://-based URL; it only affects local files.
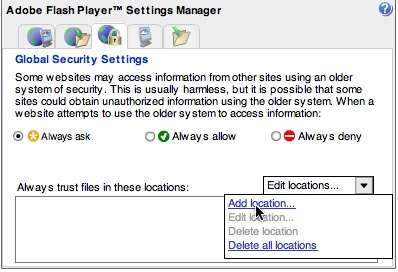
The solution is to add the v4flashslideshow/ supporting files folder as trusted content, so that the Flash Player knows it's OK to let it load external data. You can go directly to the Flash Player security settings panel by clicking the OK button in the message above; you will be automatically redirected to: http://www.macromedia.com/support/documentation/en/flashplayer/help/settings_manager04.html . In the settings manager, you will need to add the v4flashslideshow/ folder as a trusted location. To do this, click the Add Location link on the dropdown menu:
In the browse dialog, click Browse for Folder...:
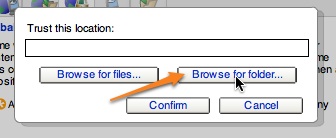
Browse to the v4flashslideshow/ supporting files folder in your site (referenced in the error message above) and click OK. The folder should appear in the list of trusted files.
Tip: On Macintosh systems, you may need to manually edit the path to include /Volumes/Macintosh HD/ or similar (based on your actual path). What's important is that the URL exactly matches that which is displayed in the browser when previewing. Otherwise, the Flash Player won't know to trust the content, and the preview will fail.
Tip: On non-english systems where the path includes accented characters, you may need to manually edit the path, replacing the accented character(s) with their non-accented counterparts.
Tip: If you perform the above steps and you still receive the error when previewing, check the tip above. If that's not the issue, try re-loading the security settings panel. If the folder you just added is NOT there, and won't persist when you add it again, this indicates that your Flash Player settings folder has become corrupted. The solution is the remove the current Flash Player settings folder, which forces a new clean one to be created:
If you wish to preview the slideshow in context, within your page, you need to save your changes in the external wizard and insert or update the slideshow. This will cause the latest data to be committed to file and the latest slideshow HTML to be added to your HTML page. Once you have done this, you are ready to preview the slideshow.
To ensure that the preview displays properly in the browser when using Dreamweaver's Preview In Browser feature, it is important to disable the 'Preview In Browser' > 'Preview Using Temporary File' setting in the Dreamweaver Preferences dialog. Failing to do this can cause the slideshow to appear as a gray square with a 'broken image' icon in the corner. To make this setting change, go to Edit > Preferences... (Windows) or Dreamweaver > Preferences... (Mac), select the Preview in Browser section, then disable the 'Preview Using Temporary File' option:
Open the Preferences panel:
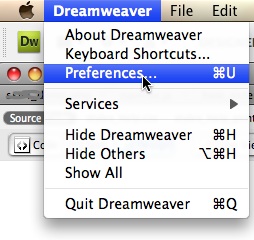
And disable the setting:
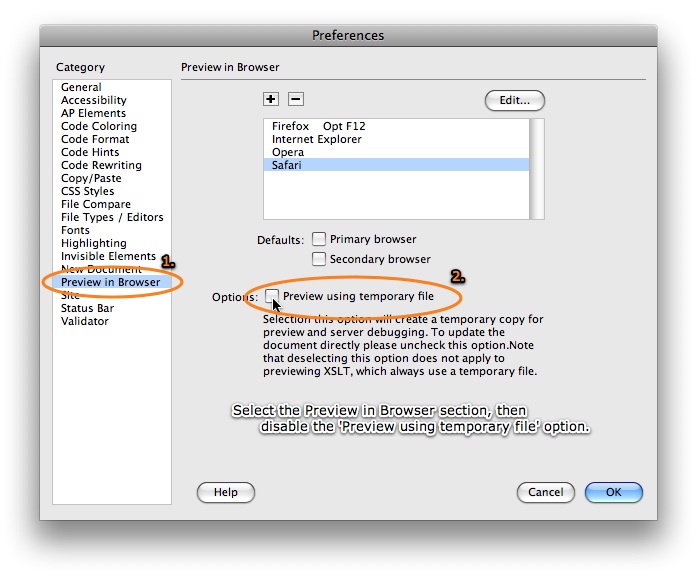
Open the Preferences panel:
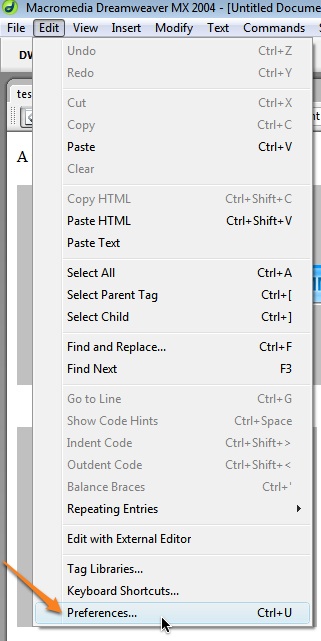
And disable the setting:
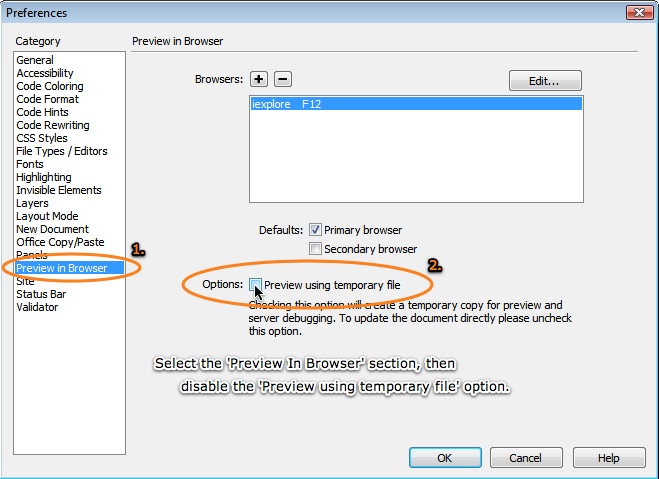
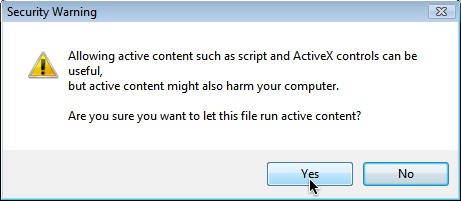
You can now use the Preview in Browser feature and the slideshow should appear properly. If you receive error messages about Flash Player security, see the section above on Flash Player Security Settings. If you are using Internet Explorer on Windows, you may receive a security warning about running scripts or ActiveX content. As with the Flash Player security restrictions, these do not appear once you view the slideshow from an http://-based URL after uploading; they only affect local previews from file://-based URLs. To make IE allow the the slideshow to appear, click the notification bar, select 'Allow Blocked Content...', then click Yes:

When the preview window in the wizard is launched, the current XML data is committed to the configuration file. The latest slideshow HTML code is written to the _xfs_v4_preview.htm file in the same directory as the HTML page on which you're inserting/editing a slideshow. This can be used as an incremental save feature; if you forget to save your work or the wizard quits unexpectedly, you can recover your work by doing the following: