 Download Help PDF (29MB) | Search:
This topic only applies to the Dreamweaver extension version of the product. If you're using the Standalone version, see this topic.
To access the Insert Wizard to create a new slideshow, there are two options. First, the 'XML Flash Slideshow v4 - Insert Slideshow' button can be accessed in the DWUser section of the Insert Panel. The panel is accessed via Window > Insert. The specific appearance of the panel varies depending on your version of Dreamweaver and your configuration:
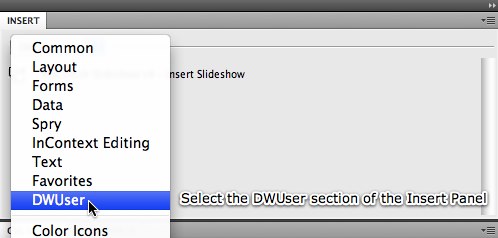
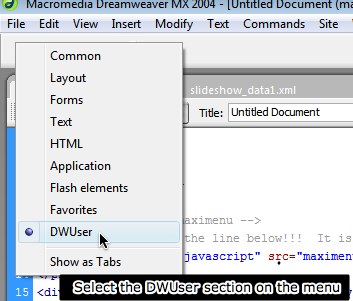
Select the DWUser section of the Insert Panel:
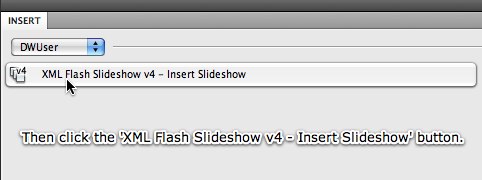
Then, click the 'XML Flash Slideshow v4 - Insert Slideshow' button:
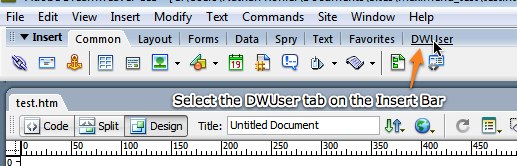
First, selec the DWUser tab on the Insert Bar:
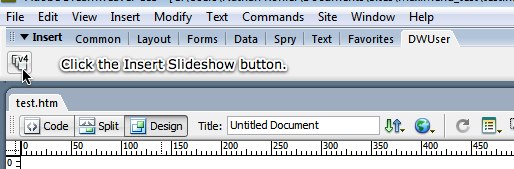
Next, click the 'XML Flash Slideshow v4 - Insert Slideshow' button:
Open the Insert Bar dropdown:

Select the DWUser section on the dropdown menu:
Finally, click the 'XML Flash Slideshow v4 - Insert Slideshow' button:

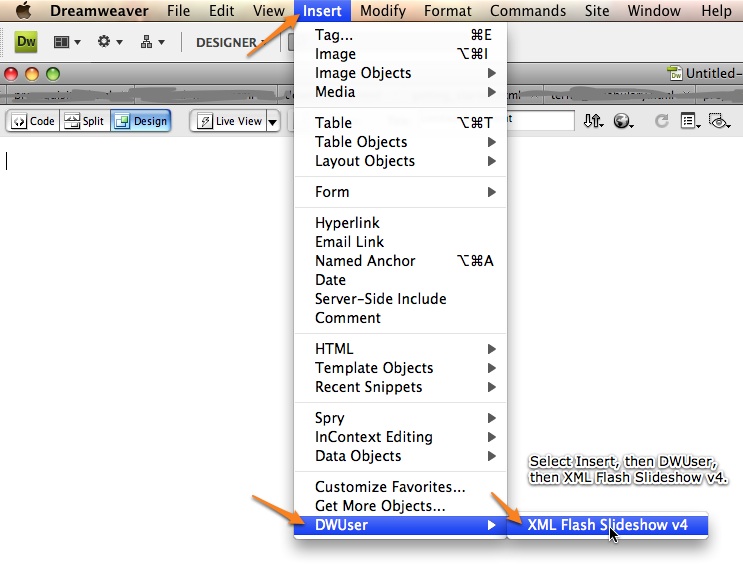
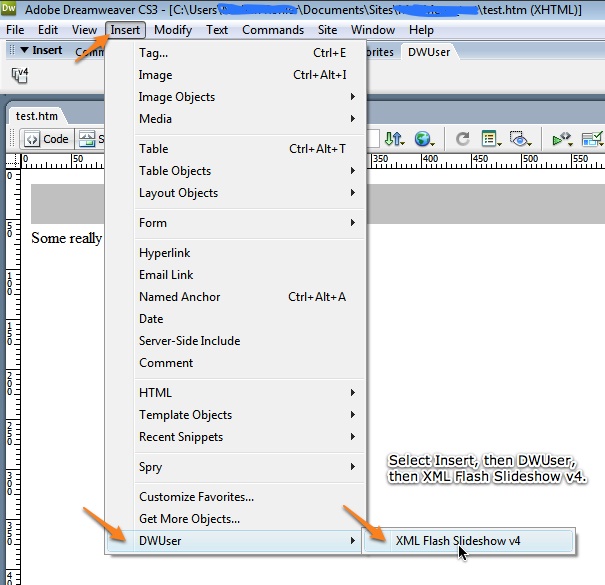
The Insert Slideshow wizard can also be accessed from the Insert Menu, which is the menu at the top of your screen next to File, Edit and View. It is accessed by selecting Insert > DWUser > XML Flash Slideshow v4.
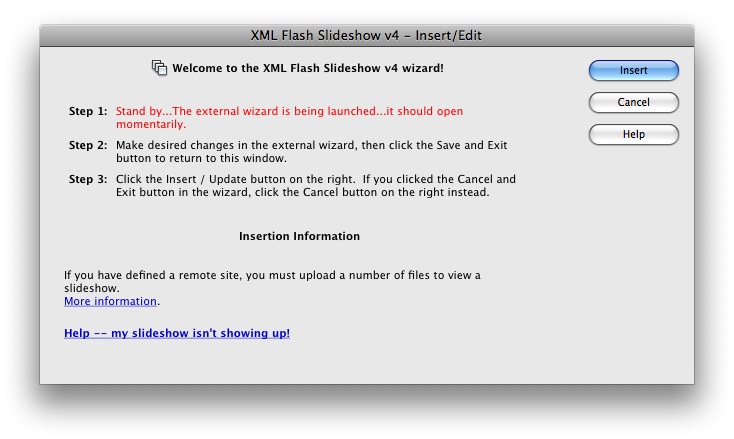
After you have clicked the Insert Slideshow button, the Dreamweaver extension dialog will momentarily appear:
Note: If you installed the external wizard to somewhere other than the default location and the extension can't find it, you will be notified that it needs help locating it. If you receive this message, expand the following pod for details.
This sub-section only applies if you receive the following message:
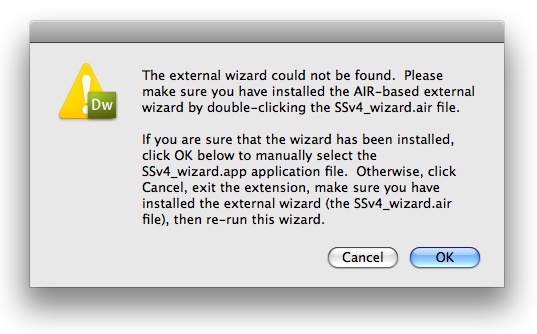
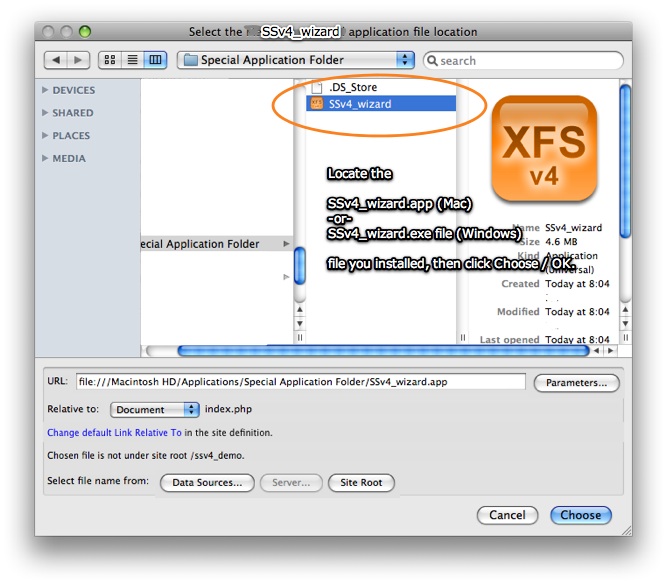
This will happen if you installed the external wizard to a location other than the default, or sometimes if you have a non-standard drive setup (e.g. a separate drive exclusively for applications). When this happens, you must manually locate the wizard once so that the extension knows where to launch it from. Click OK to launch the browse dialog. You will need to know where the external wizard application was installed to. On Windows this will be SSv4_wizard.exe in the Program Files folder, and on Mac it will be SSv4_wizard.app in the Applications folder. Browse to the custom installation location and select the file. The following screenshot is from Macintosh, but the dialog is similar on Windows:
If you receive a 'not in site root' warning, click 'No' (this is important!):
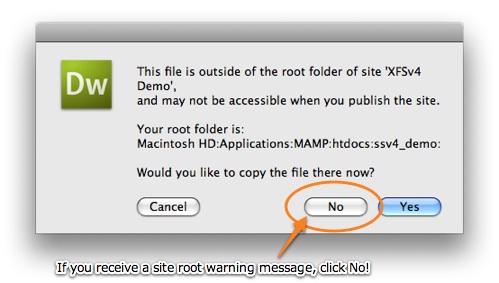
On subsequent launches, the special location will automatically be used.
After a moment, the external wizard window will open:
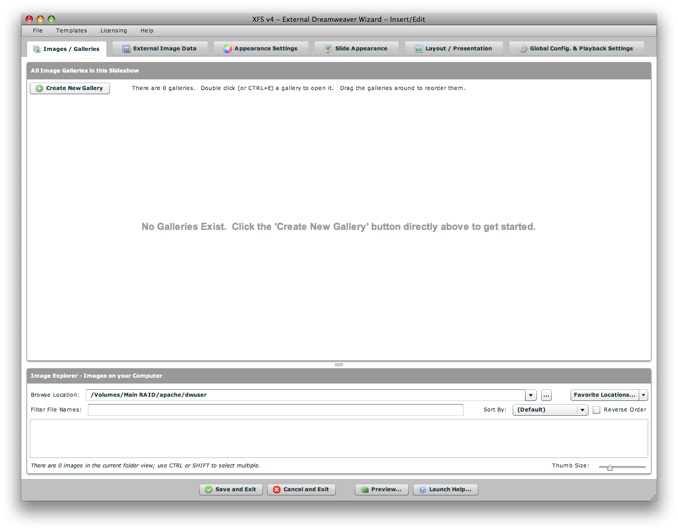
This is where you will actually create the slideshow. When you are finished making edits in the external wizard, click the Save and Exit button:
![]()
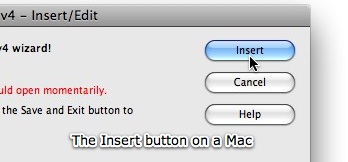
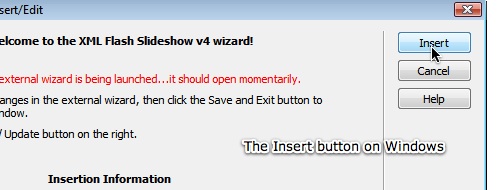
You will return to the Dreamweaver extension window shown above; click the Insert button to actually insert the slideshow into your page:
Note that the process of actually using the external wizard is detailed in subsequent topics. Once you have inserted a slideshow, it will appear in Design View like this:
If you switch to code view, you'll be able to view the Slideshow HTML code which was inserted. At some point, you'll likely need to make edits; to see how to access the Edit Wizard, see the next topic: Editing Slideshows .
If you wish to create additional slideshows, simply run the Insert Slideshow wizard again (by clicking the Insert Slideshow button).