Are you still primarily using Arial, Verdana or – please not! – Comic Sans MS on your websites? Until recently, beautiful typography and the internet didn’t play nicely together. Using fancy fonts meant embedding all of your text in images, or risking incompatibility with many users. It was a royal pain!
Today, however, there’s hope. As browsers have matured, support for embedding custom typefaces in webpages has advanced. Many new online tools and services have popped up to make web fonts easily accessible to web designers. Unfortunately, though, most services are rather expensive, and most do-it-yourself tools aren’t easy to use.
In this quick tip, I want to share an option that’s both free and easy to use. Google Web Fonts is a free service offered by Google as part of their effort to help beautify and improve the web. They’re working together with the community and typography specialists to create special fonts that are 100% free for you to use on your commercial and non-commercial projects. Best of all, they handle all of the messy technical details to get them onto your webpages. Adding these special fonts to your pages is as simple as adding one line of code to your page and updating your CSS’s font-family declaration.
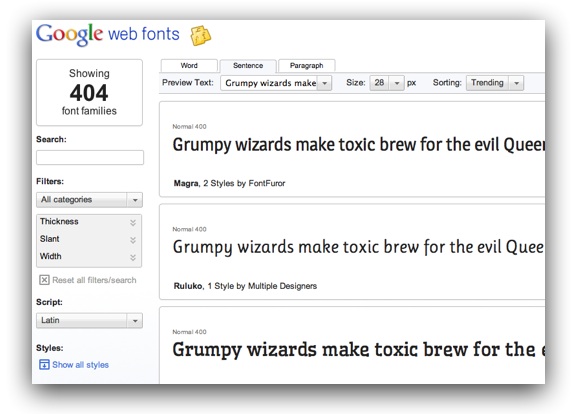
To get started, head over to the Google Web Fonts site and use the search tools and filters on the left to find a font you like:

You’ll note that there are options along to top to customize the preview of each font. You can view a single word (great when choosing a font for headlines), a sentence, or even a full paragraph. There are some default choices for preview text, or you can enter your own. The size is customizable as well. These options allow you to see exactly how each font would look in your page.
When you find a font you like, there are a couple of options. If you plan on using several custom fonts, you can use the Add To Collection button. For this demo, though, we will assume you’re only using one custom font. For these situations, just click the Quick Use button:

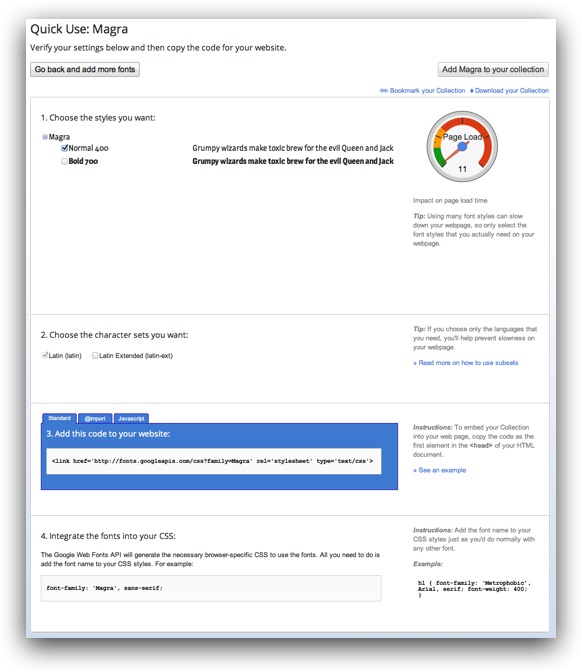
You’ll now see a page where you can choose additional options and get the needed code for your page:

First, there are options for which styles of the font you want to embed. If you plan to use e.g. bold or italic, you’ll need to choose these variations in this section. Keep in mind that every additional variation you add will increase the download size required for the fonts; a meter on the right shows you the overall impact. While it can be fun to go crazy with fancy fonts, remember that your users won’t care how beautiful a page is if it takes minutes to load! You usually won’t want to add more than a couple of custom fonts to a single page.
Next up, you can choose what character sets you need. Some fonts have options for including Cyrillic characters, extended Latin characters, etc. Your needs will depend on what language(s) you use on your site.
Finally, there’s the super-simple code to add to your page. It’s just a single line of code that goes just after the opening <head> tag in your page. For example, here’s the code I needed in my demo:
<link href='http://fonts.googleapis.com/css?family=Magra' rel='stylesheet' type='text/css'>
And that’s it! You’re ready to start styling text with CSS. Some example code will be shown on the Google Web Fonts page. Here’s an example of using inline CSS to style text to use our new font, Magra:
<p style="font-family: 'Magra', sans-serif;">My styled text!</p>
Pretty easy, huh? Google Web Fonts is an easy, free way to beautify your site. Have fun, and post in the comments if you get some great results with this helpful tool.
